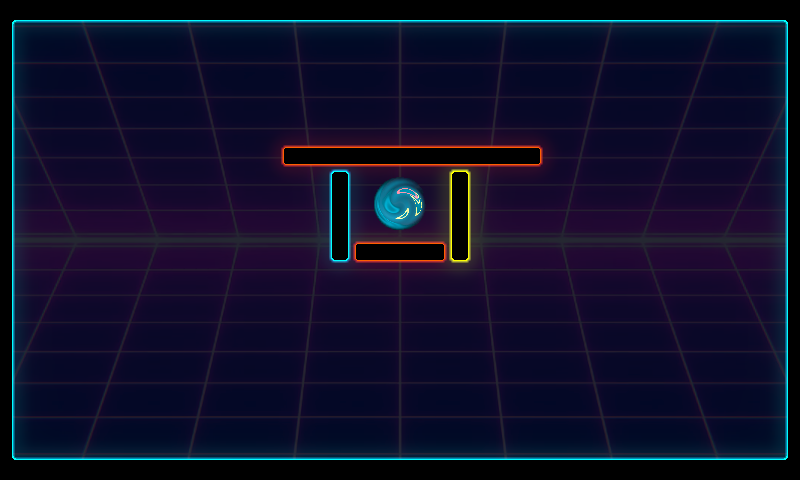
After some delay here is the promised whirlpool effect post! Here is what I’m talking about:
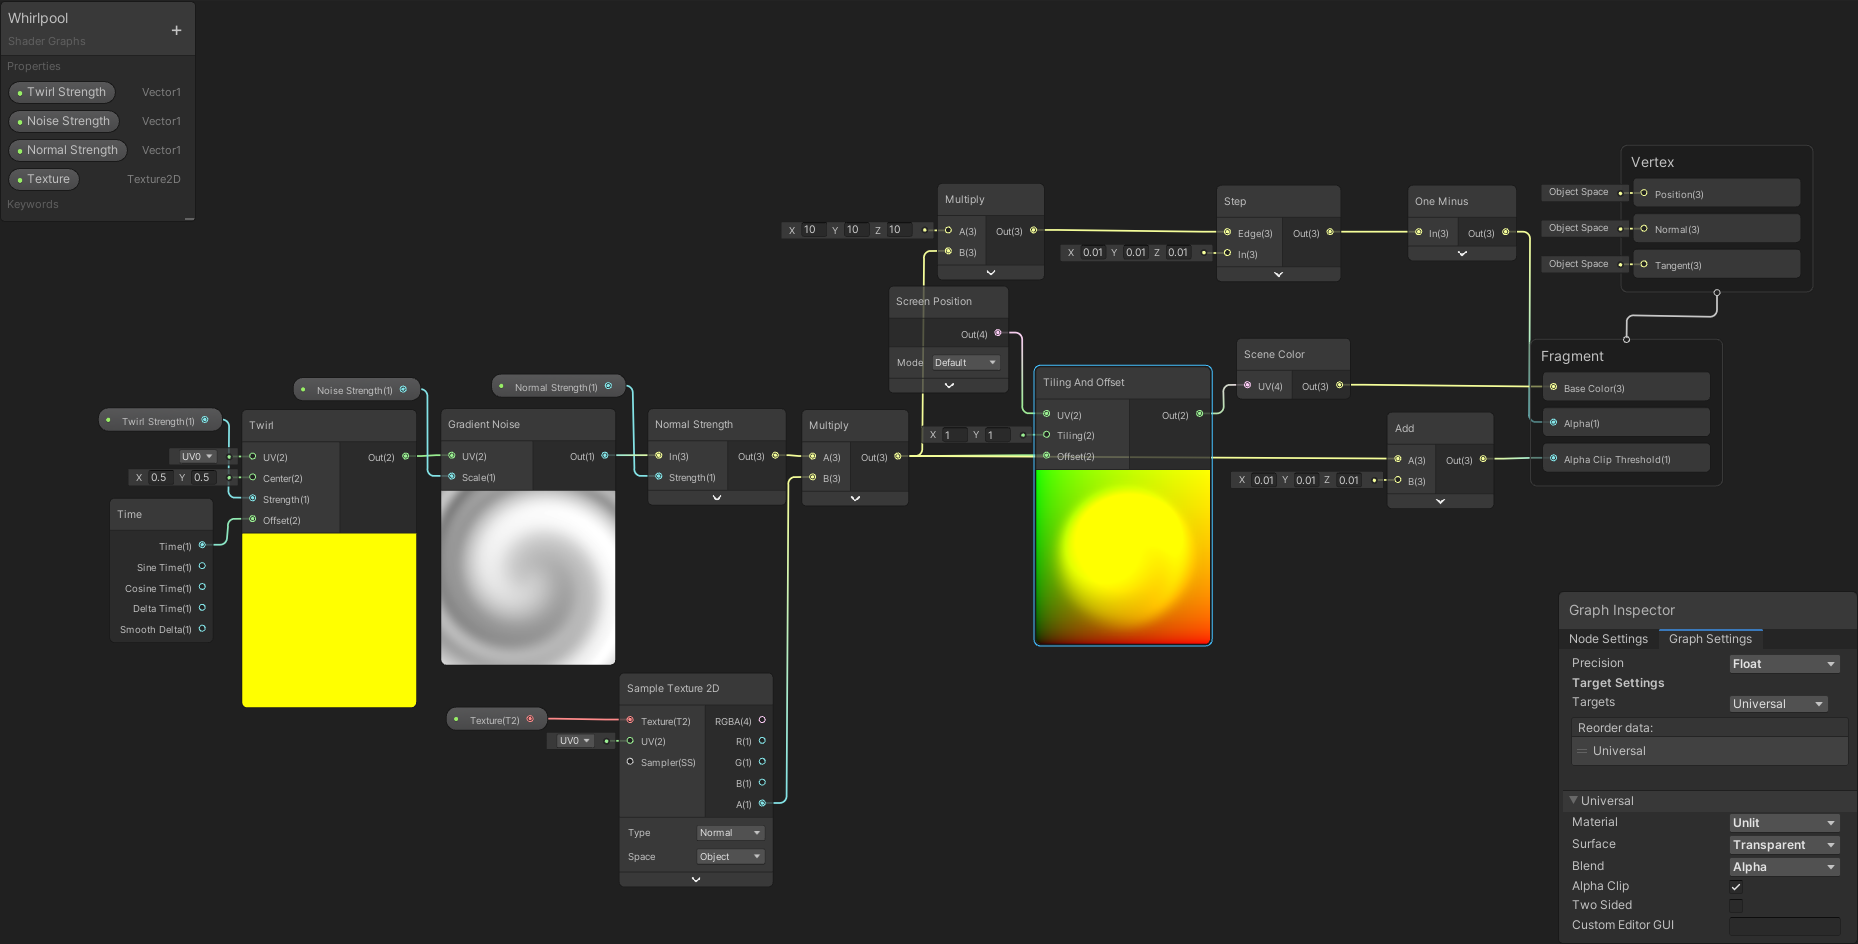
See that twirly thingy in the right top corner? Yeah, that is it. Just like the shockwave effect from the previous blog post, I made use of a shader described in this video. Let’s begin by recreating the shader from the video. The only difference will be the type of shader. I used the Unlit Graph instead of PBR Graph. Open up the shader, from the Graph Settings set the Surface to transparent.

Also, I skipped the leftmost multiplication of time and texture spread, and the “Normal From Height” node. For my purposes, I found out that the default values of 10 for Twirl Strength, 1 for Noise Strength, and 0.1 for Normal Strength works pretty well. Now let’s test it!
Already, we are getting somewhere! Now let’s make it circular. As always, I think the best way to achieve it would be to read the alpha value from a texture. So we can just paint a simple texture and change the shape to whatever we like. If you have been following my post, you will know that it is easy enough to do. All you need is a Texture variable, a Sample Texture 2D node, and a multiplication node. Multiply the alpha value of the texture with the output of the Normal Strength node, and pass the result to the Tiling and Offset node.

Here is what we have got:
We are getting closer. But like before, we can make the whole plane out, not only the image part. And just like before we need to clip the values below a certain threshold. Get the multiplication result from the previous step, once again multiply it by 10 (a magic number which makes it look slightly better), pass the result to the Step node with In value of 0.01, revert the result with the One Minus node, and pass it to the Alpha value of the Fragment node. To set a proper Alpha Clip Threshold, once again get the same multiplication value, add a low value to it (something like 0.01), and pass it to the Alpha Clip Threshold.
You should get something like this;
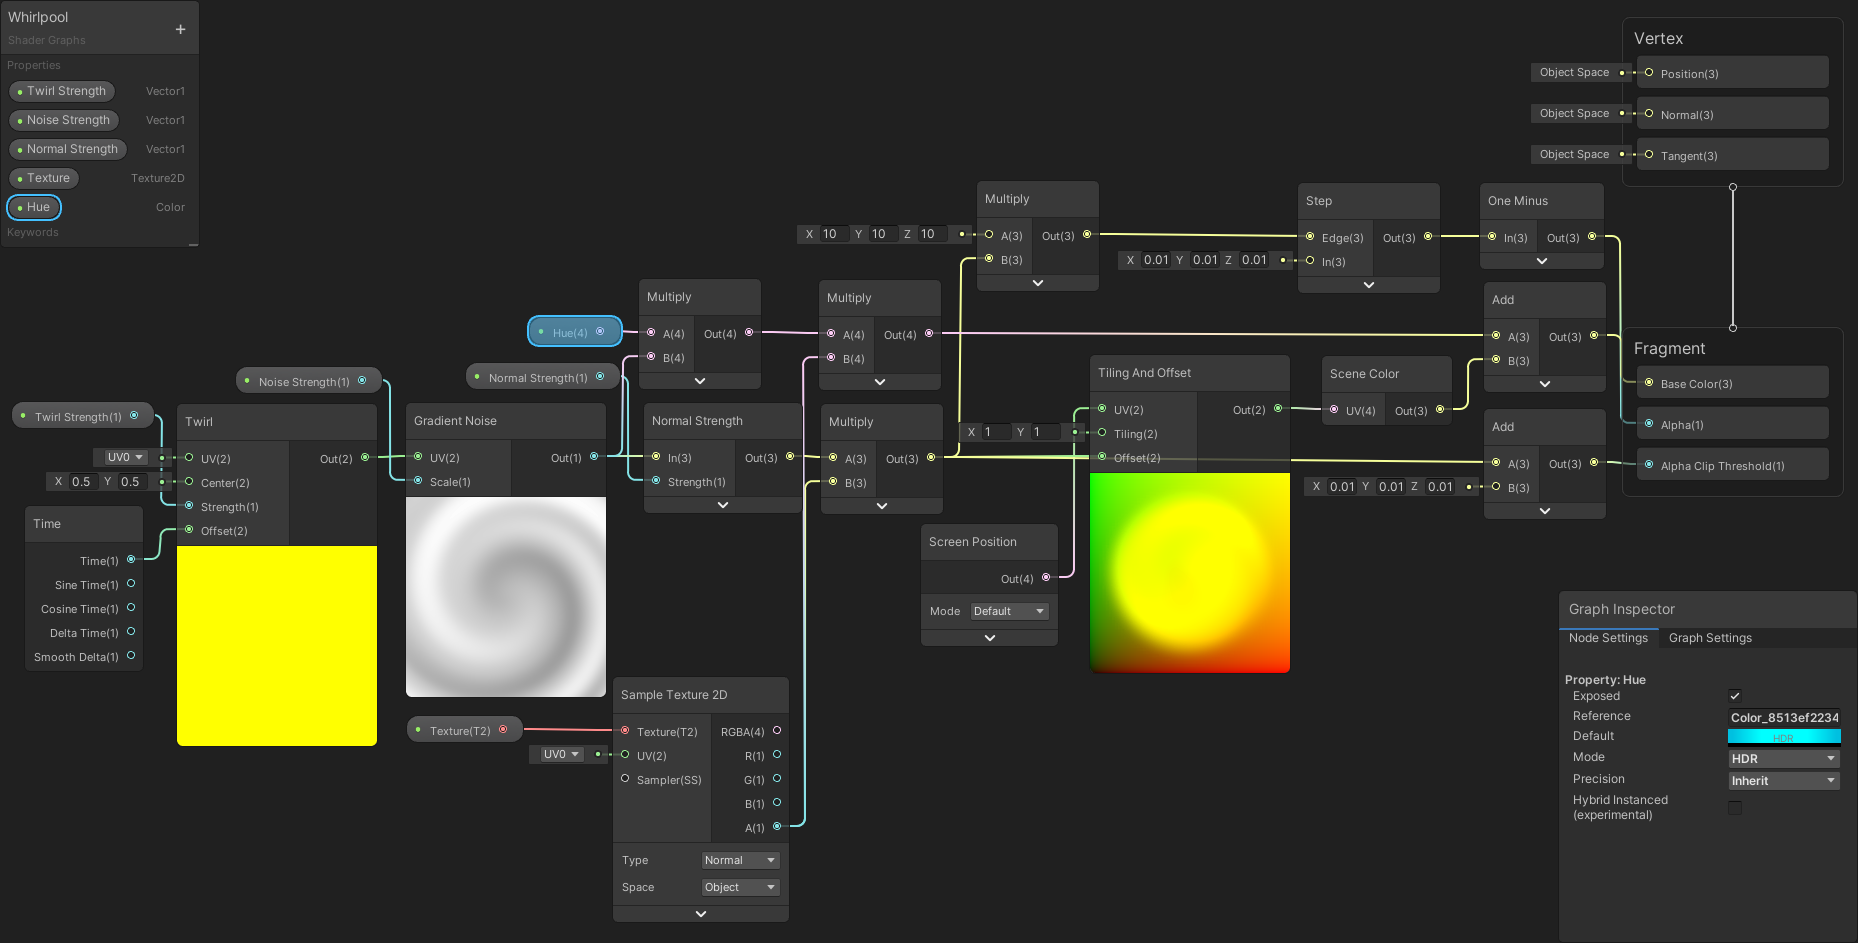
Almost there! Only one thing is left: color. Create a Color variable, and multiply it with the output of the Gradient Noise node. Then once again, multiply the result with the alpha value of the texture, add to the scene color, and pass the final result to the Base Color field of the Fragment node.
Here is the final result:
And that will be all for this blog! Let me know if you have any questions or know a better way of achieving this effect. See you at the next one!
Teşekkürler dostum elinize sağlık.