
Finally, with a little delay, I will talk about the Matrix-like shockwave effect in the Particle in a Box remake!
As I mentioned in the first post in this devlog series, I don’t know much about shaders. During my research, I found this awesome video showing how to make a portal effect. The effect was pretty close to what I want, except it was not radial.
First of all, make sure that you enabled the “Opaque Texture” in the renderer asset.

Now create an unlit shader graph, and set the master node’s “Surface” to “Transparent.”

We could create a wave effect with some fancy math nodes, but I think a normal texture will be a much simpler and more flexible solution. So all we need to do is to displace pixels according to the normal value. And this shader does just that:
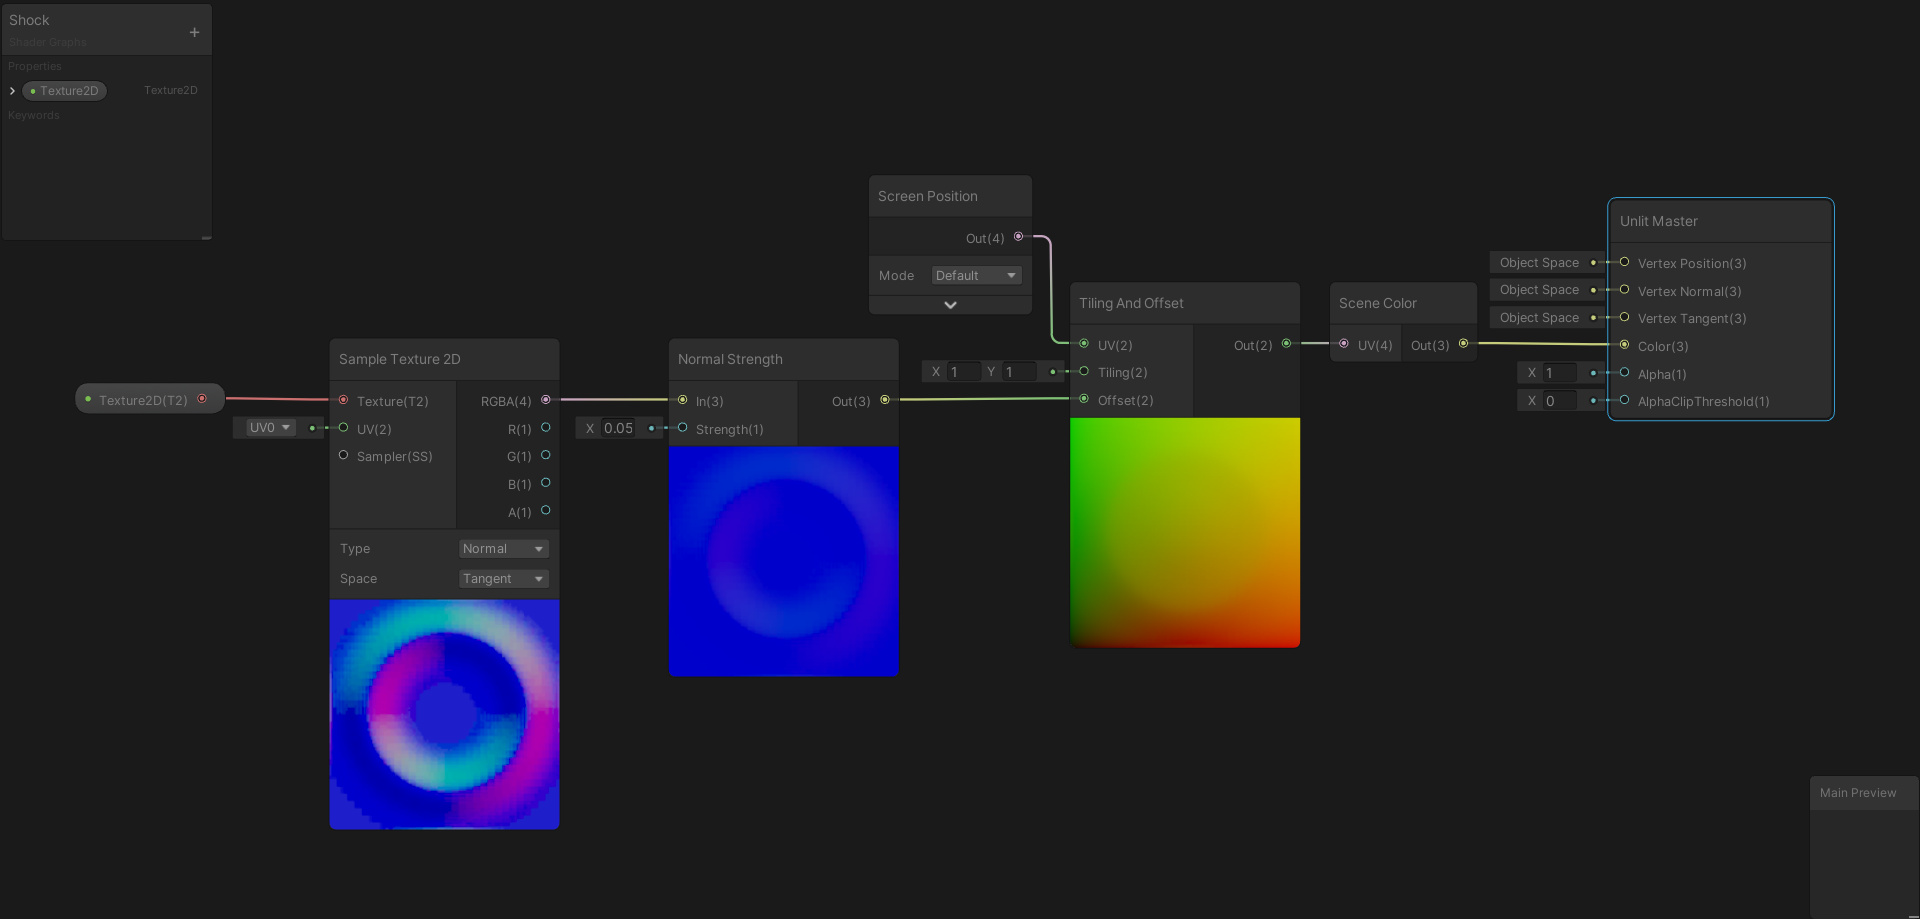
Create a material using this shader, set the normal texture of the material, assign it to a plane, and observe how objects in the behind it bend and twists!

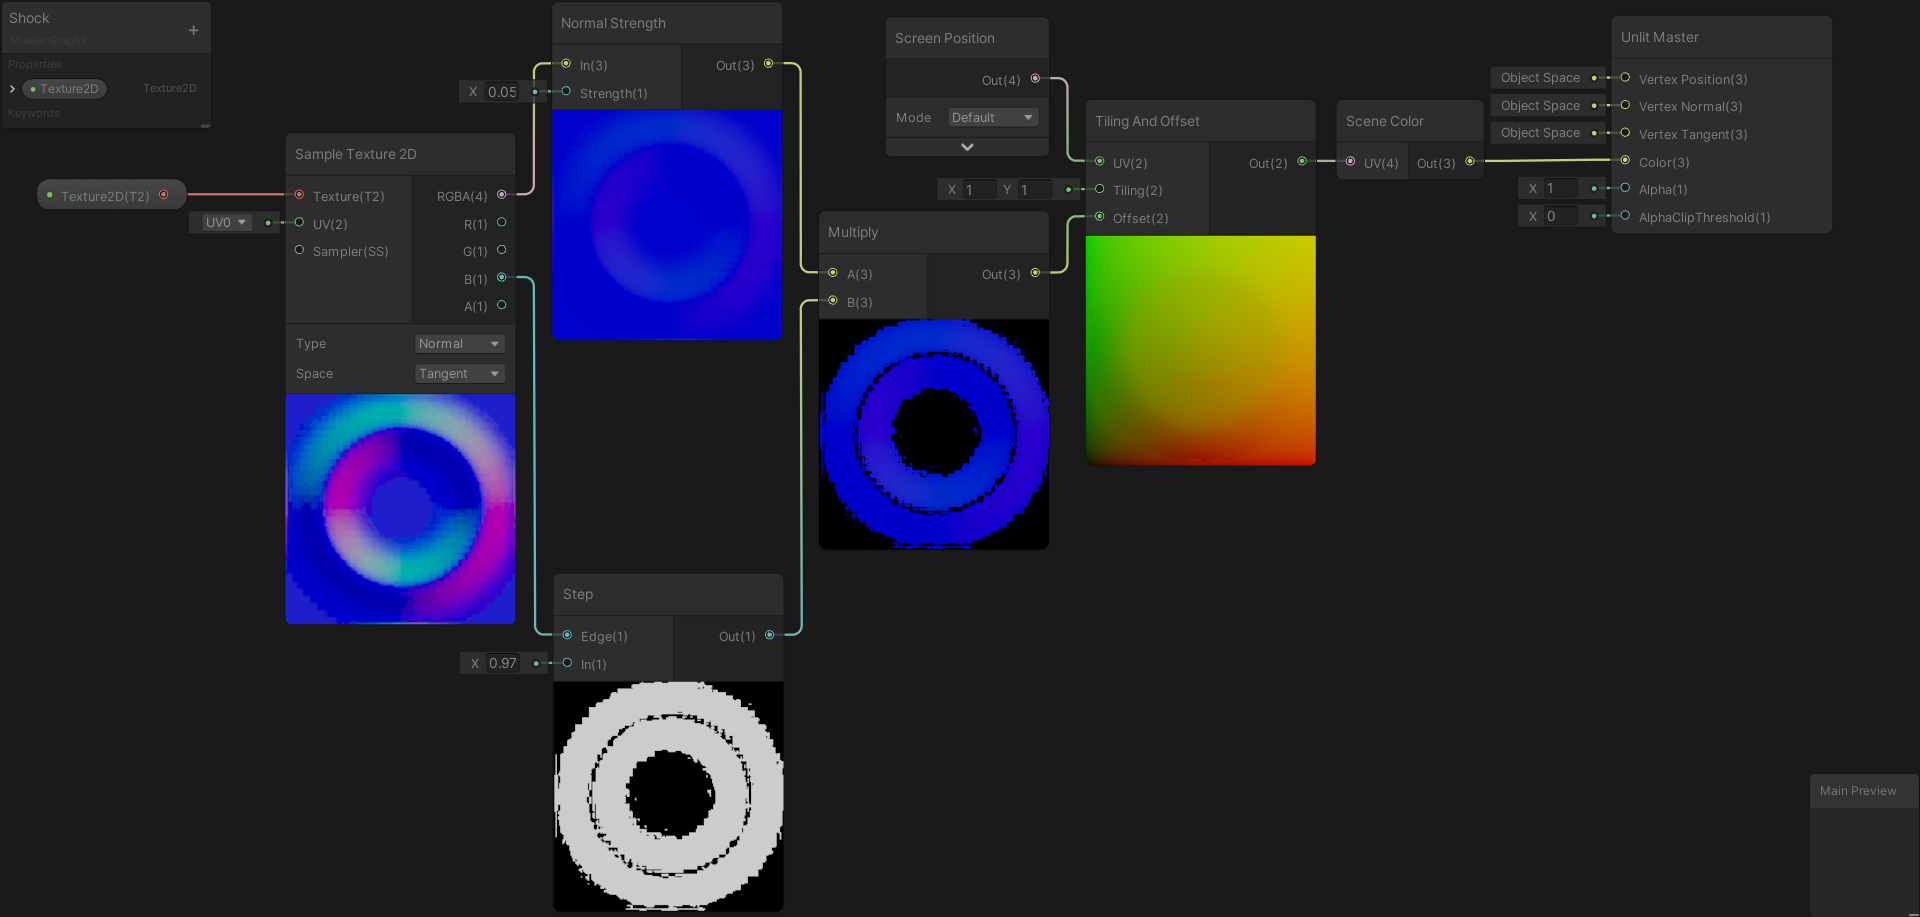
The rest should be obvious; just scale the plane and you got the effect! Except there are a couple of small, barely noticeable problems. If you look closely you will notice a small displacement on the edges of the plane. Also, the plane removes the bloom effect. It might not be very noticeable since the effect lasts about half a second, but when the plane is destroyed or disabled, the bloom pops back in a single frame. We can solve this problem by decreasing the alpha value before destroying the plane.
Neither of these problems is hard to solve, and both have a similar solution. Notice that the blue parts creating the least displacement. So let’s just clamp the blue color below a certain threshold using the step node, and multiply the normal strength with the result. It will solve our first problem.
To solve the second problem we will need to change the alpha value of the material. So let’s create a vector1 variable, set the reference to “_Alpha” (we will need this value if we want to change the alpha from a script), and connect the new variable to the “Alpha” of the Unlit Master node. By playing with the alpha value, you can fade out the effect:
Almost there! To make the plane completely invisible we need to reverse the output from the step node with OneMinus node, and pass the result to the AplhaClip Threshold value of the Unlit Master node. One last edge case remains: the plane is still visible when the alpha value is exactly one. So subtract a very small value, like 0.001 from the Alpha variable before passing it to the Master node, and you are done!
Now all you need to do is write a script or create an animation to scale up the plane. Also, I added one more variable for the normal strength. My final shader looks like this:

Let me know if you have any suggestions, or if you know a better way to achieve this effect!
Great post! I am familiar with coding shaders but new to Shader Graph and trying to learn it. I followed this tutorial and learned a lot from it. Instead of using a normal texture, I created a ring texture with code and felt like it is better for animating this effect. I’d like to share it. Thanks for the tutorial!
Code that I used for the ring: https://imgur.com/E4HZah9
I’m very happy to hear that this tutorial was useful for you! I felt like using an image would make this shader more flexible. Since you can just swap it with another image to change its shape. But you are right, for this specific case creating a ring texture with code will work as well 🙂